6 November 2026 · Soldr
How to upload code to an ESP32 from your browser (no IDE to install)
Short answer: open your build on app.soldr.ai in Chrome or Edge on a computer, press Flash to my board, then Compile, then Flash. Chrome asks which serial port to use; pick your ESP32 and press Connect. Soldr writes the firmware and shows Flashed when the board is running it. There's no IDE to install. Some boards' USB chips (CP2102, CH340) need a one-time driver before the port shows up.
Uploading code to an ESP32 usually means installing an IDE, adding the ESP32 board package, picking the right board and port, and hoping the toolchain versions agree. In a browser that supports Web Serial, all of that collapses into a few clicks: the code is compiled on a server, and the browser talks to the board over USB directly. Here is the whole process, using a real build: an ESP32 weather display with a DHT22 sensor and a 0.96 inch OLED.
What you need
- Chrome or Edge on a desktop or laptop. Flashing uses the browser's Web Serial support, which these browsers have on a computer.
- An ESP32 board and a USB data cable. Common ESP32 boards flash this way, including the DevKit, S3 and C3. We used an ESP32-DEVKITC.
- A build with code. Describe what you want to make on Soldr, sign in, and press Generate code. Sign in and get 100 credits free.
Step 1: check that the code compiles
When Soldr writes the code, it compiles that exact sketch on its own compiler before you see it. Look for the green line under the reply. In our build it said the code compiles for the ESP32-DEVKITC Development Board. If Soldr couldn't check the code, it tells you so.
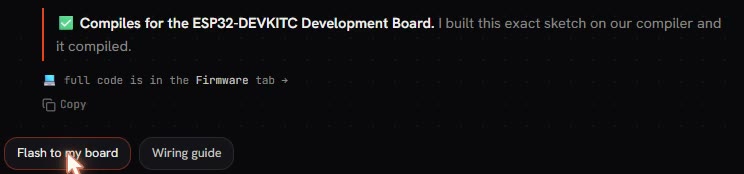
Under the reply there's a Flash to my board button. Press it.
Step 2: open the Firmware tab and compile
The Firmware tab opens next to the chat. It holds the full sketch as editable source, a board picker (here, ESP32 (.bin)), and the hint Press Compile first - then Flash writes it to your board. You can read the code here, and edit it and recompile before you flash.
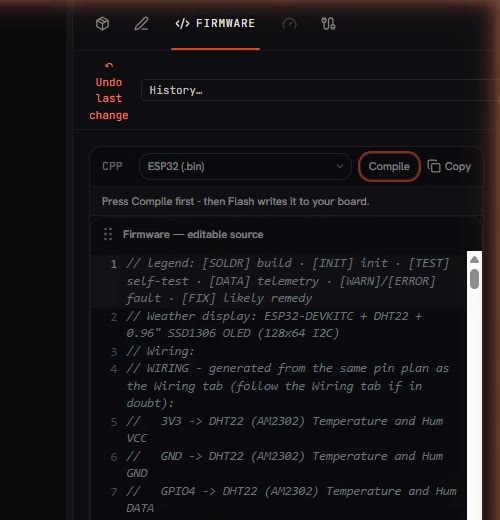
Press Compile. Soldr builds a firmware file for your board. Ours took 58.4 seconds and ended with Compiled (.bin). A compile costs 5 credits.
Step 3: plug in the ESP32 and press Flash
Connect the board to the computer with a USB cable, then press Flash. Chrome opens its own dialog: app.soldr.ai wants to connect to a serial port. Pick your board and press Connect. On our machine it was listed as CP2102 USB to UART Bridge Controller (COM4); yours may have a different name or port number.
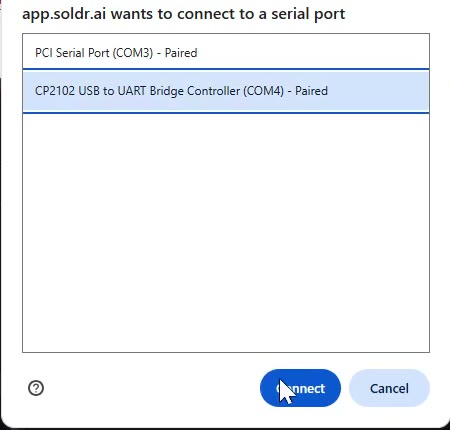
Step 4: watch it write, then check the result
Soldr writes the firmware to the board and shows the progress as a percentage.
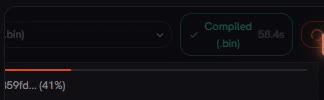
When it finishes, you see Flashed and a line saying the board is running your firmware.

To see what the board is doing, open the Serial Monitor in the same tab. If the output looks like noise or a crash dump, here's how to read it.
If the port doesn't show up
- Driver. Many ESP32 boards use a CP2102 or CH340 USB-to-serial chip. On some computers that chip needs a one-time USB driver before any program, browser or IDE, can see the port. Install the driver for the chip printed on your board, then unplug and replug it.
- Cable. Some USB cables only charge. If nothing appears in the list, try a cable you know carries data.
- Browser. Use Chrome or Edge on a computer. Web Serial isn't available in every browser or on phones.
- Stuck connecting. Some ESP32 boards need you to hold the BOOT button while the upload starts. That's a property of the board, and the same in any tool.
If it flashed but the board still won't start, read It compiled. It flashed. The board still won't boot.
Why this works without an IDE
Two things normally live on your computer: the compiler toolchain and the upload tool. Here, the compiler runs on Soldr's server, so you never install the ESP32 core or match versions. The upload runs in the browser through Web Serial, so there's no separate upload program either. What's left on your side is a browser, a cable and, for some boards, a USB driver.
The same flow works for other boards: the Arduino Uno, Mega and Nano flash over USB through the browser (a Nano with the new bootloader may need the Arduino IDE), and a Raspberry Pi Pico flashes in two presses. Prefer your own tools? Download the sketch and upload it from the Arduino IDE or PlatformIO.
The parts in this example
- ESP32-DEVKITC development board (or the 30-pin ESP32 with a CP2102)
- DHT22 temperature and humidity module
- 0.96 inch OLED display, 128x64 I2C
Soldr lists the parts for your build and shows how to wire them, pin by pin; Buy all puts them in one Compoden cart, shipped across India (COD if checkout offers it for your order). For a full walk-through of a build, see how to use Soldr. For more on the tools, see the ESP32 web IDE and the ESP32 code generator.
Questions
Which browsers can upload code to an ESP32?
Chrome or Edge on a desktop or laptop. They support Web Serial, which lets the page talk to the board over USB.
Do I need to install drivers?
You don't install an IDE or a toolchain. Boards with a CP2102 or CH340 USB chip may need a one-time USB driver on some computers before the port appears.
Can I change the code before I flash it?
Yes. The Firmware tab is editable source: change the code, press Compile again, then Flash.
What does it cost?
Questions are free. Generated code costs credits, priced by the size of what is written, and a compile costs 5 credits. Sign in and get 100 credits free.
Describe your ESP32 build on Soldr and flash it from your browser.